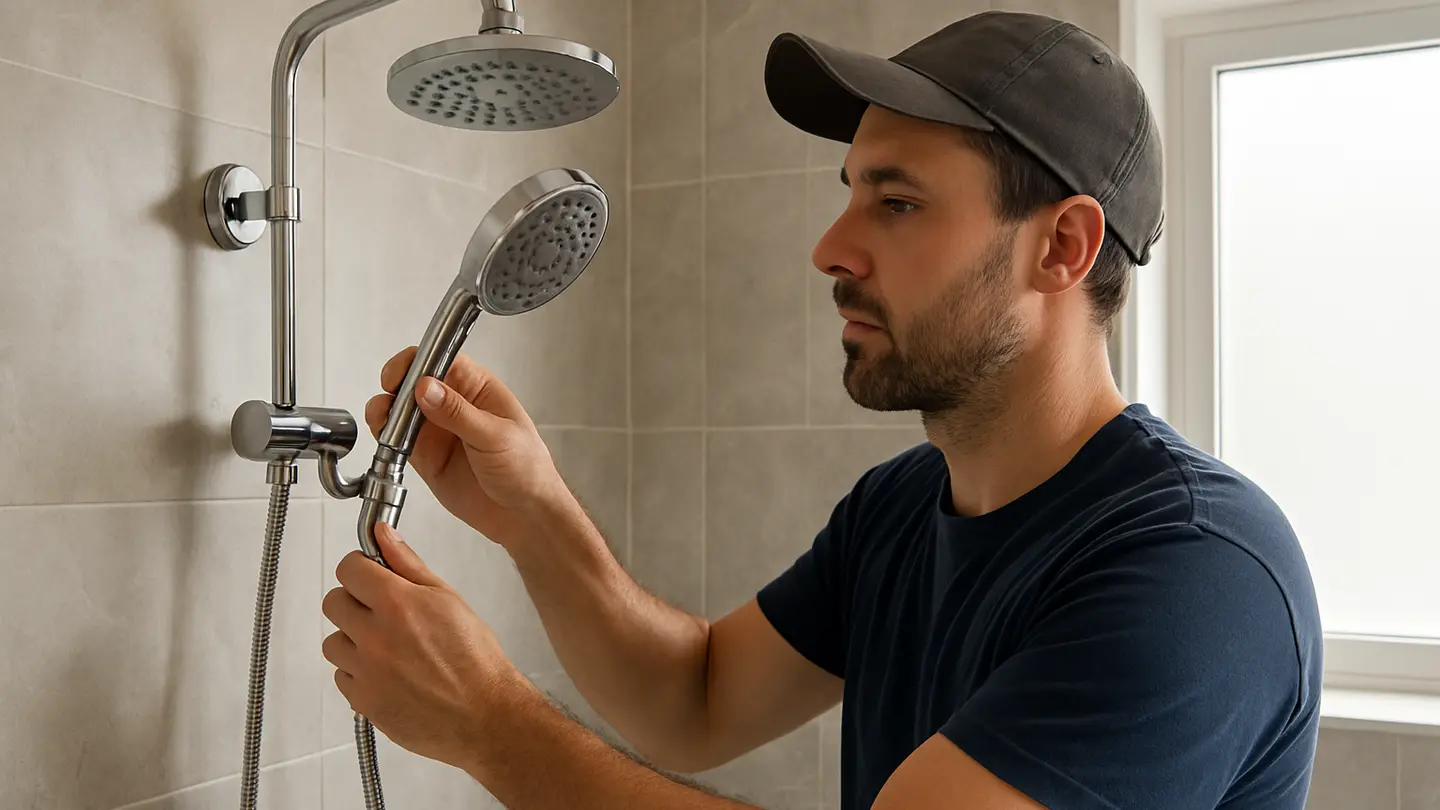
A handheld shower head adds flexibility without a full remodel. In many standard showers, the retrofit can be completed at the shower arm with basic tools, a compatible diverter, a flexible hose, and a mounting bracket.
Handheld showers make it easier to rinse shampoo, bathe children, wash pets, support assisted showering, and clean shower walls or glass. This guide explains how to check compatibility, choose components, install the main parts, and test the setup for leaks, comfort, and long-term performance.
Start by Checking the Existing Shower Arm
The shower arm is the short pipe that projects from the wall and supports the fixed shower head. In many bathrooms, it has standard threaded connections, so the existing shower head can be removed and replaced with a diverter or handheld shower kit without opening the wall.
Before selecting products, inspect the shower arm. Confirm that the threads are in good condition, the pipe feels secure, and there is enough clearance for a diverter, hose, and holder. A straight, gooseneck, or longer angled arm can affect how the hose hangs and how easy the diverter is to operate.
Key compatibility checks include:
| Checkpoint | Why it matters |
|---|---|
| Thread condition | Damaged or corroded threads may leak or prevent secure installation. |
| Arm length and angle | Short arms can crowd the diverter and fixed shower head. |
| Wall clearance | Large shower heads or diverters may contact tile, glass, or shelving. |
| Shower enclosure layout | Hose length and holder position should suit the available space. |
| Water pressure | Low pressure may limit performance, especially with multi-function spray heads. |
Water pressure should influence product choice. A handheld shower with many spray modes may feel weak if pressure is limited. For multi-unit projects, confirm local flow regulations, building requirements, and user expectations before standardizing on a model.
Selecting a Suitable Handheld Shower Head
Choosing a handheld shower head is not only about appearance. The right model should fit the existing shower system, provide adequate reach, suit the intended users, and be practical to maintain. For B2B purchasing, finish consistency, replacement part availability, complete packaging, and installation simplicity also matter.
A good selection process balances performance, water efficiency, hose quality, mounting style, finish, and maintenance requirements. In accessible bathrooms, family bathrooms, hotels, rentals, and senior living projects, usability may matter as much as spray performance.
Functional Features Worth Comparing
Adjustable spray modes commonly include full spray, concentrated rinse, massage, mist, and mixed patterns. These support everyday bathing, tile rinsing, pet washing, and assisted showering. However, more functions are not always better; for high-turnover use, simple and durable controls may be preferable.
Water-saving designs are also worth reviewing. Some handheld shower heads maintain a comfortable spray while using less water. Others include a pause button that temporarily reduces or stops flow while soaping, shaving, or assisting another user. Check whether the pause function fully stops water or only reduces flow, as designs and code considerations vary.
Hose length is a major usability factor. A shorter hose may suit a compact stall, while a longer hose helps with cleaning enclosures, bathing children, washing pets, or assisting seated users. Match reach to the bathroom layout rather than appearance alone.
Other features to compare include:
- Anti-kink hose construction: Helps prevent twisting and improves daily handling.
- Shower head size: Larger heads may provide broader coverage but can feel heavier.
- Spray face material: Flexible nozzles can make mineral removal easier.
- Grip shape: Important for children, older adults, and assisted showering.
- Optional filter elements: May be useful in some water conditions but require replacement planning.
- Flow-control compatibility: Relevant where pressure, conservation, or code compliance must be managed.
For procurement teams, verify what is included in the kit. Some products include the hose, washers, and bracket; others require separate diverters or mounts.
Coordinating the Handheld Shower with Bathroom Design
A handheld shower should look intentional once installed. Chrome remains widely used because it is bright, versatile, and easy to match. Brushed nickel, stainless-look finishes, matte black, brushed gold, and gunmetal tones may suit contemporary projects, boutique hospitality bathrooms, or coordinated renovations.
Shape and scale affect the final impression. A slim cylindrical hand shower can look minimal, while a wider face may resemble a traditional shower head. In compact stalls, oversized handheld units can appear crowded, especially with a diverter and fixed shower head.
The holder or bracket should match the rest of the installation. Adjustable holders are useful because they allow users to direct the spray downward, outward, or toward a seated position.
Tools and Materials Needed Before Installation
Most shower-arm retrofits require only a limited set of tools and components. Exact requirements depend on whether the installation uses a shower-arm bracket, wall-mounted holder, slide bar, or tub spout diverter.
Core materials usually include:
- Handheld shower head
- Flexible shower hose
- Diverter valve, if keeping the fixed shower head
- Rubber washers or gaskets
- Plumber’s tape, often PTFE tape
- Shower-arm bracket, wall holder, or slide bar
Common tools include:
- Adjustable wrench
- Pliers
- Soft cloth or protective tape to prevent finish damage
- Screwdriver, if the holder requires screws
- Drill and appropriate bits, only if installing a wall-mounted bracket or slide bar
Some tub-shower combinations may require a tub spout diverter rather than a shower-arm diverter. More complex systems with concealed plumbing may require an in-wall diverter, drop elbow, or mixing valve changes.
Before beginning, ensure the shower valve is fully closed. For basic shower-arm work, shutting off the bathroom’s water supply is not always necessary if the valve is closed and working properly, but it may be advisable in commercial, older, or uncertain plumbing conditions. If there is doubt about valve or pipe condition, involve a qualified plumber.
Installing the Handheld Shower Head
For many standard shower-arm configurations, adding a handheld shower head is a manageable DIY or maintenance-team task. The typical workflow is to install a diverter, mount the holder, connect the hose, and test the assembly.
Installation complexity varies. A shower-arm-mounted bracket is usually simplest. A wall holder or slide bar can improve ergonomics but may require drilling into tile, stone, fiberglass, or acrylic. Concealed systems, older plumbing, and multi-outlet controls may require professional installation.
Step 1: Fit the Diverter Valve
A diverter valve directs water between the existing fixed shower head and the new handheld shower head. Some diverters switch fully between outlets, while others may allow both outlets to run at the same time, depending on design and available pressure.
Remove the existing fixed shower head from the shower arm by turning it counterclockwise by hand or with an adjustable wrench. Protect the finish with a cloth if using a wrench. Clean the shower arm threads to remove old tape, mineral deposits, or debris.
Apply fresh plumber’s tape to the shower arm threads, wrapping in the direction of the threads so it does not unravel. Attach the diverter and tighten it according to the product instructions. Usually, hand-tightening followed by a small wrench adjustment is enough. Overtightening can damage threads, crack fittings, or stress the shower arm inside the wall.
Reconnect the fixed shower head to the diverter outlet, using tape if required by the manufacturer. Turn on the shower and check the connection area for leaks before continuing.
Step 2: Position and Mount the Handheld Holder
The handheld shower needs a secure place to rest when not in use. The two most common options are a shower-arm mount and a separate wall-mounted holder.
A shower-arm mount is often integrated with, or connected directly to, the diverter assembly. It is usually easiest because it does not require drilling. It works well when users can comfortably reach the shower arm and the handheld angle is acceptable from that height.
A wall-mounted holder provides more placement control. It can be positioned lower for children, seated users, or assisted showering, or placed to reduce hose clutter. A slide bar adds flexibility because the holder can move for users of different heights.
When installing a wall holder or slide bar, confirm the wall material and fastening requirements. Tile, stone, fiberglass, and acrylic surrounds require different anchors and drilling methods. Avoid drilling into concealed plumbing, electrical wiring, waterproofing membranes, or structural elements without proper verification.
Step 3: Connect the Flexible Hose
The flexible hose connects the water outlet to the handheld shower head. One end typically attaches to the diverter or bracket, and the other attaches to the handheld unit. If the hose has a conical nut, that end often connects to the handheld shower head so it sits properly in the holder.
Rubber washers are essential. Place washers inside the hose nuts before connecting. Missing, misaligned, or damaged washers are a common cause of leaks. Thread each connection by hand to avoid cross-threading.
In most installations, hand-tightening is sufficient. If a connection leaks during testing, tighten it gently with pliers or a wrench while protecting the finish. Excessive force can deform washers, strip threads, or damage plated surfaces.
After assembly, run water through both the fixed shower head and handheld shower head. Operate the diverter several times and inspect every connection point.
Final Setup Checks After Installation
Post-installation testing confirms that the upgrade works properly and is comfortable for intended users. Check water flow, leaks, hose movement, holder stability, spray direction, and reach.
For property owners, facility managers, and contractors, these checks are especially important before turning over a bathroom or repeating the installation across multiple rooms.
Inspect All Connections for Leaks
Run the shower and inspect the shower arm, diverter, fixed shower head connection, hose ends, and handheld shower head connection. Look for dripping, spraying, or moisture around threaded joints.
If a connection leaks, shut off the shower and tighten the joint gently. If the leak continues, disassemble the connection and check the washer, thread alignment, and plumber’s tape. Do not rely on overtightening to solve a poor seal.
Water should exit only through the selected outlet and intended nozzles. Brief dripping may occur when switching outlets as water drains from the unused head, but continuous leakage indicates a sealing or diverter issue.
Let the shower run briefly to flush loose tape fragments, mineral particles, or installation debris. Slow leaks may not appear immediately, so observe the connections before finishing.
Fine-Tune Spray Direction and User Comfort
Test each spray setting under normal water temperature and pressure. Spray modes that seem adequate during a quick cold-water test may feel different during actual use.
Adjust the angle of the fixed shower head and handheld holder to improve coverage and reduce overspray. In small enclosures, an outward-facing handheld shower can send water past the door or curtain. In accessible showers, the angle should support seated use without requiring the user to hold the shower head continuously.
If the system includes compatible flow-control components, adjust them only according to product instructions and applicable code requirements. Avoid modifying restrictors or internal parts in ways that could affect compliance or performance.
Confirm that the hose reaches all intended areas without pulling tightly, kinking, or dragging awkwardly. The bracket height should allow users to dock and remove the handheld shower comfortably.
Maintenance Practices That Extend Service Life
A handheld shower head is exposed to water pressure, heat, minerals, soap residue, and repeated handling. Routine maintenance helps preserve spray quality, reduce leaks, and extend service life.
For B2B buyers managing multiple bathrooms, maintenance considerations should be part of product selection. Easy-clean nozzles, replaceable washers, durable hoses, and available spare parts can reduce service calls over time.
Clean the Spray Face and Hose Regularly
Mineral buildup and soap scum can reduce spray performance. Nozzles may clog, spray patterns may become uneven, and the handheld unit may look worn before the rest of the bathroom hardware.
Many shower heads can be cleaned with a diluted vinegar soak, but always follow the manufacturer’s care instructions. Some finishes may be sensitive to acidic cleaners if exposure is too long or too concentrated. After soaking, gently brush the nozzles with a soft brush or cloth.
Avoid harsh chemicals, abrasive pads, steel wool, or aggressive descaling tools unless specifically approved for the product. These can scratch finishes, dull plated surfaces, or damage rubber nozzles.
Wipe the hose periodically. Soap residue can collect in grooves, and mineral deposits can build up around the connection nuts.
Replace Worn Washers, Hoses, and Parts When Needed
Inspect the hose regularly for cracks, stiffness, bulging, corrosion, or leaks. A hose that kinks repeatedly or no longer hangs naturally may need replacement even if it has not failed.
Connection washers are small but important service parts. If a connection continues to leak after cleaning and proper tightening, replacing the washer is often the simplest fix. Keep compatible washers available for maintenance teams, especially in properties with many identical installations.
Persistent spray-face clogging, reduced performance, or broken spray selectors may require replacement parts or a new handheld unit. Use parts that match the specific model and connection standard. Mixing incompatible parts can lead to poor sealing, awkward fit, or premature wear.
Optional Upgrades to Consider with a Handheld Shower
Adding a handheld shower head can be a standalone improvement or part of a broader shower upgrade. Additional components may improve flexibility, accessibility, comfort, or multi-outlet control, but they should match the existing plumbing, wall conditions, budget, and installation goals.
For a simple retrofit, a shower-arm diverter and handheld kit may be enough. For higher-end renovations, accessible bathrooms, or hospitality projects, a more integrated system may provide better long-term value.
Using a Shower Column for Integrated Fixed and Handheld Functions
A shower column combines fixed and handheld shower functions in one vertical assembly. It typically mounts on the shower wall and routes water to multiple outlets, such as an overhead shower and a handheld shower.
One advantage is visual integration. Instead of a diverter and hose appearing as add-on components, the fixed and handheld functions are organized into a single vertical layout. Many columns also allow the handheld holder height to be adjusted for users of different heights or mobility needs.
However, a shower column is usually more involved than adding a basic handheld shower to an existing shower arm. Installation may require careful alignment, secure wall mounting, compatibility with existing water outlets, and sometimes plumbing modification. Confirm rough-in requirements and wall suitability before specifying columns across a project.
Choosing More Advanced Diverter Controls
Diverter systems control where water flows. In a simple retrofit, a shower-arm diverter may switch between a fixed shower head and a handheld shower head. In a tub-shower combination, a tub spout diverter may direct water from the tub spout to the shower outlet.
More advanced systems use wall-mounted diverters to control multiple shower outlets separately. These may support a fixed shower head, handheld shower head, rain shower, body sprays, or tub spout. Some allow one outlet at a time, while others allow selected combinations, depending on valve design and available flow.
For new construction or major renovations, in-wall diverter controls can provide a cleaner appearance and better user control. For existing bathrooms where wall work is not planned, a shower-arm diverter remains the simpler and less disruptive option.
Related Shower Upgrade Guides
For buyers planning a broader bathroom fixture update, the following related topics are useful to review:
- How to compare fixed shower heads, rain shower heads, and handheld shower heads
- What to check before specifying shower hoses and brackets for multi-unit projects
- How diverter valves affect shower system layout and user experience
- When to choose a slide bar instead of a fixed handheld holder
- Maintenance considerations for shower heads in hard-water environments