How to Deep Clean a Shower Hose Step by Step
Weak shower pressure, a musty odor, visible discoloration, or chalky deposits around the fittings can all point to one overlooked component: the shower hose. In hotels, gyms, rental housing, healthcare-adjacent facilities, and other high-use environments, a neglected hose can affect both user experience and maintenance workload.
Knowing how to deep clean a shower hose is useful for facility managers, purchasing teams, installers, and distributors because it helps extend product service life and keeps shower systems performing as intended. Deep cleaning removes mineral scale, soap residue, trapped debris, and possible microbial buildup from both the exterior and interior of the hose. It can also help restore cleaner water flow before a maintenance team decides whether replacement is necessary.
The process is straightforward, but it should be done methodically: remove the hose safely, inspect it, apply a suitable cleaning solution, scrub the connectors and ridges, flush the interior, dry it fully, and check for damage before reinstalling.
Know the Shower Hose Materials and Common Buildup Risks
Most shower hoses used in residential and commercial bathrooms are made from stainless steel, PVC, or a combination of an inner tube and an outer protective layer.
Stainless steel shower hoses are commonly selected for durability, kink resistance, and a more robust appearance. They often have a flexible metal outer layer over an inner tube. This construction can withstand frequent handling, making it suitable for hospitality, apartment buildings, and other high-turnover settings.
PVC shower hoses are usually lighter, flexible, and lower-cost. They are often found in budget-conscious installations or applications where easy handling is a priority. However, PVC surfaces may show staining, stiffness, or wear over time, especially when exposed to hot water, cleaning chemicals, and hard-water minerals.
Regardless of material, shower hoses can accumulate:
- Limescale: White, chalky deposits caused by minerals in hard water.
- Mineral staining: Greenish or brownish discoloration around connectors, often linked to water chemistry or metal components.
- Soap residue: Film that can trap dirt and reduce the clean appearance of the hose.
- Mold or mildew: Dark spots or musty odors, especially when the hose remains damp between uses.
- Sediment: Small particles that may settle inside the hose and affect flow.
Over time, buildup can reduce water pressure, create unpleasant odors, and raise hygiene concerns. In commercial environments, these problems can also increase service calls and customer complaints. Regular cleaning is therefore not only a housekeeping task; it is part of shower system maintenance.
Tools and Cleaning Supplies to Prepare
A deep clean does not usually require specialized equipment. Most maintenance teams can use common cleaning supplies already available in a facility.
Prepare the following:
| Item | Purpose |
|---|---|
| White vinegar | Helps dissolve limescale and mineral deposits |
| Baking soda | Provides mild abrasion and odor control |
| Mild dish soap | Helps lift oily or greasy residue |
| Warm water | Dilutes cleaning agents and supports rinsing |
| Soft brush or old toothbrush | Cleans threads, ridges, and connector crevices |
| Microfiber cloths | Wipe exterior surfaces without scratching |
| Bucket or basin | Holds soaking solution |
| Spray bottle | Applies cleaning solution to exterior surfaces |
| Gloves | Protect hands during cleaning |
| Adjustable wrench or pliers | Helps loosen tight connectors |
| Towel or protective cloth | Protects finishes during removal |
Avoid highly abrasive pads, aggressive acids, or harsh chemical mixtures unless the hose manufacturer specifically confirms compatibility. Strong chemicals can damage finishes, weaken plastic components, or affect rubber washers and inner tubes.
The Complete Shower Hose Cleaning Method
A complete cleaning process should address both the visible exterior and the less visible interior. Exterior cleaning improves appearance and removes surface grime, while internal cleaning helps clear residue that may affect water flow or odor.
For B2B maintenance planning, the method below can be used as a standard operating procedure for routine deep cleaning. It is especially useful for properties with hard water, high shower usage, or recurring complaints about pressure and smell.
Step 1: Prepare the Shower Area and Remove the Hose
Start by turning off the water at the shower control. In most cases, shutting off the bathroom’s main water supply is not necessary, but the shower valve should be fully closed before disassembly.
Place a towel, microfiber cloth, or protective mat in the shower area. This helps prevent scratches if tools slip and protects plated finishes from accidental impact.
Before removing the hose, note the connection setup. For maintenance teams working across multiple rooms or units, a quick photo can help confirm which end connects to the shower outlet and which end connects to the handheld shower head. This is particularly useful when hoses have different connector shapes, restrictors, washers, or flow components.
Unscrew both ends of the hose carefully. Many hoses can be loosened by hand, but mineral deposits may cause the fittings to seize. If the connector is tight, use an adjustable wrench or pliers. Wrap the fitting with a cloth first to reduce the risk of scratching chrome, brushed nickel, matte black, or other decorative finishes.
Remove any rubber washers or filters carefully and place them in a safe location. Inspect them for deformation, cracking, or heavy deposits. A worn washer can cause leaks even after the hose itself has been cleaned.
Step 2: Inspect and Rinse Away Loose Debris
Fully extend the hose on a clean surface and inspect it under good lighting. Look for mineral deposits, discoloration, visible grime, kinks, dents, stiff sections, or surface cracks.
White or chalky deposits usually indicate limescale. Greenish buildup around metal fittings can also suggest mineral deposits or water chemistry reactions. Black spots, especially in damp grooves or near connectors, may indicate mold or mildew growth.
Next, rinse the hose with warm water. Hold one end under running water and allow water to pass through the hose. Rotate and gently flex the hose while rinsing to help dislodge loose particles. Do not bend it sharply, as excessive force may damage the inner tube or deform the outer casing.
This initial rinse removes surface dirt and sediment before the cleaning solution is applied. It also gives the technician a better view of stubborn stains or deposits that require more focused brushing.
Step 3: Mix a Safe Cleaning Solution
For most shower hoses, a basic cleaning solution of equal parts white vinegar and warm water is sufficient. For example, mix one liter of white vinegar with one liter of warm water in a bucket or basin. The vinegar helps break down mineral deposits without being as aggressive as many commercial descaling products.
For odor control and light scrubbing, baking soda can be used separately as a paste. Mix baking soda with a small amount of water until it forms a spreadable consistency. Apply this paste to stained areas, ridges, and connectors after soaking.
For heavier residue, a stronger option is to increase the vinegar concentration and add a small amount of mild dish soap. Dish soap helps lift oily buildup, body oil residue, and soap film. A practical mixture is two parts vinegar, one part warm water, and a few drops of mild dish soap.
Before full cleaning, test the solution on an inconspicuous area of the hose, especially if the hose has a colored finish, plastic coating, or decorative surface. Wait a few minutes, rinse, and check for dulling, discoloration, or surface changes.
Do not mix vinegar with bleach or chlorine-based cleaners. Combining cleaning chemicals can create hazardous fumes and may damage hose materials.
Step 4: Scrub Connectors, Ridges, and Interior Surfaces
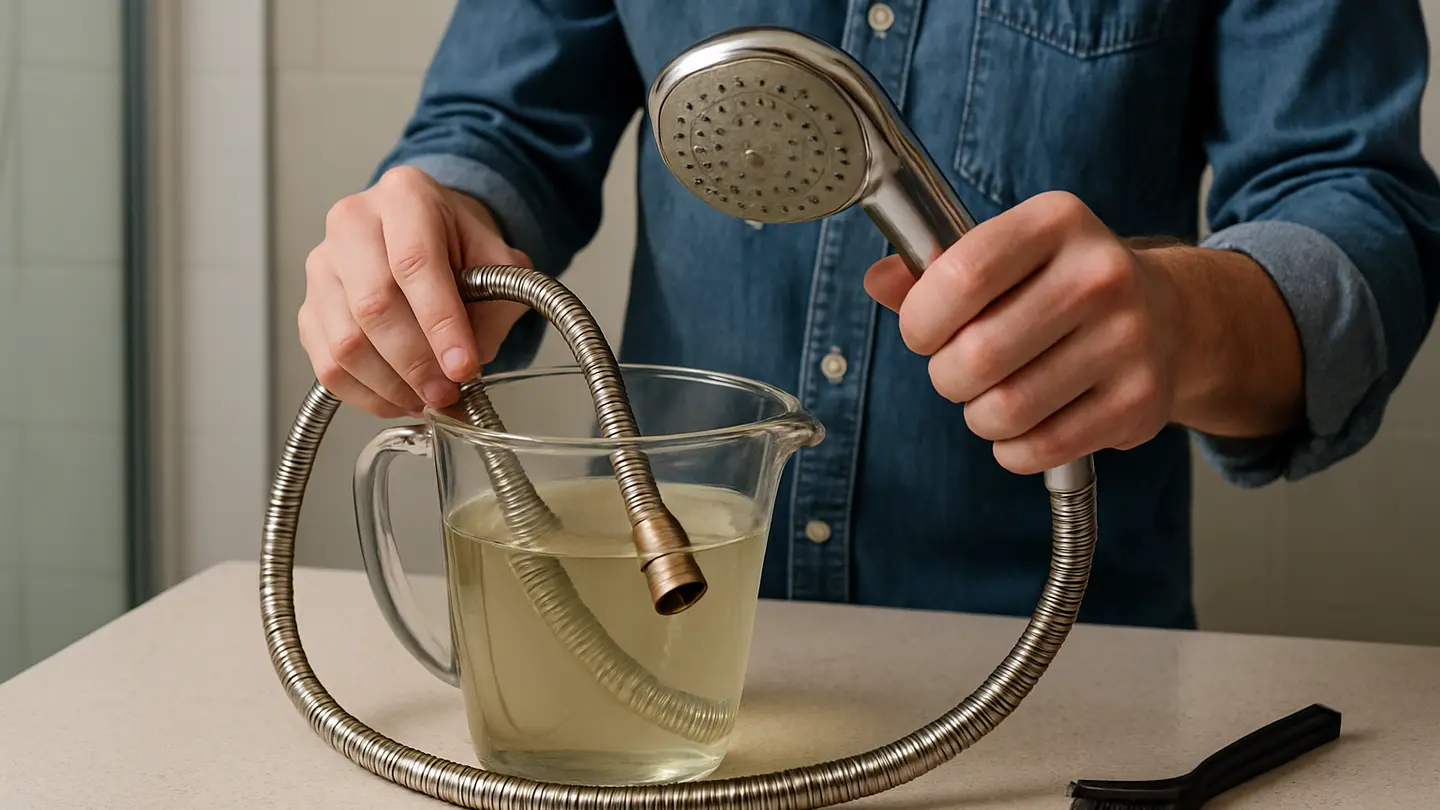
Submerge the hose in the vinegar and warm water solution. A 30-minute soak is often enough for routine buildup, while heavier deposits may require a longer soak. Ensure both connectors are exposed to the solution, since scale and grime commonly collect in the threads and crevices.
After soaking, use a soft brush or old toothbrush to clean the connectors. Focus on:
- Threaded areas
- Washer seats
- Crevices around the fittings
- Flexible ridges or grooves
- Areas with visible mineral deposits
Work along the hose body in small sections using moderate pressure. For stainless steel hoses, brush along the ridges rather than forcing bristles against the weave. For PVC hoses, avoid aggressive scrubbing that could scratch or dull the surface.
Flexible ridges require particular attention because moisture, soap film, and mineral particles can remain trapped between them. Apply the baking soda paste to stubborn areas and brush gently until the residue begins to lift.
Internal cleaning can be done in two ways. The first is soaking: keep the hose submerged long enough for the vinegar solution to loosen internal scale. The second is flow-through rinsing: pour or run warm cleaning solution through the hose, then follow with clean warm water. For heavily soiled hoses, combining both methods is more effective.
If the hose has a removable flow restrictor, filter screen, or washer assembly, clean these parts separately according to the shower fitting design. Small screens can trap sediment and are often responsible for pressure complaints that appear to originate from the hose.
Step 5: Rinse Thoroughly and Let the Hose Dry
Rinsing is as important as scrubbing. Any remaining vinegar, baking soda, or soap residue can affect odor, appearance, and user comfort.
Run warm water through the hose until the water flows clear and there is no noticeable vinegar smell. Rinse the exterior thoroughly, paying attention to the connector threads and ridges where paste or loosened debris may remain.
Shake out excess water from the hose. Then hang it in a U-shape with both ends pointing downward. This allows trapped water to drain rather than settle inside. Drying may take several hours depending on humidity, hose construction, and bathroom ventilation.
Before reinstalling, wipe the exterior with a dry microfiber cloth and check that the washers are properly seated. Reconnect the hose by hand first to avoid cross-threading. Tighten gently with a wrench only if needed. After reconnection, turn on the water and inspect both ends for leaks.
Preventive Maintenance to Reduce Future Buildup
Deep cleaning is useful, but preventive care reduces how often it is needed. For facilities with many bathrooms, a simple maintenance schedule can lower replacement costs and improve consistency across rooms.
Recommended preventive practices include:
- Wipe the hose exterior weekly. A microfiber cloth removes soap residue and surface moisture before it hardens into film or scale.
- Use occasional diluted vinegar rinses. In hard-water areas, a light vinegar rinse can help limit mineral deposits before they become difficult to remove.
- Improve bathroom ventilation. Exhaust fans, open vents, and adequate drying time help discourage mold and mildew growth.
- Drain the hose after showers. Letting water run out of the hose reduces standing water and lowers odor risk.
- Monitor water hardness. In areas with heavy limescale, a water softener or appropriate water treatment strategy may reduce mineral buildup across shower heads, hoses, valves, and fittings.
For commercial settings, it may be helpful to document hose cleaning intervals. High-use showers may need inspection monthly, while lower-use residential units may only require deep cleaning every few months. The correct interval depends on water hardness, usage frequency, ventilation, and hose material.
How to Troubleshoot Cleaning Problems
Even after routine shower hose cleaning, some issues may remain. Persistent stains, recurring odors, leaks, or pressure problems can indicate that the hose needs a stronger cleaning approach, closer inspection, or replacement.
Troubleshooting should separate cleaning-related problems from product wear. A hose that is dirty may be restored, but a hose that is cracked, internally deteriorated, or leaking at the fitting may not be worth additional labor.
What to Try if Stains or Odors Remain
If stains remain after the first cleaning cycle, use a stronger vinegar concentration or extend the soaking time. Heavily scaled hoses may need a second soak and scrub, especially around threaded connectors and ridged surfaces.
For lingering odors, baking soda can be used as a deodorizing paste on the exterior and around fittings. After application, rinse thoroughly so no powder remains in the threads or inner tube.
A few drops of tea tree oil can be added to a cleaning solution for scent and antimicrobial support, but it should be used sparingly and rinsed well. Oils can leave residue if overused, and not all hose materials respond the same way to additives. For commercial maintenance programs, any added ingredient should be compatible with internal cleaning policies and local hygiene requirements.
If odor returns quickly after cleaning, inspect the connected shower head, wall outlet, washers, and filter screens. The problem may not be limited to the hose. Biofilm, sediment, or mineral accumulation in adjacent components can re-contaminate a cleaned hose.
Cracks, severe stiffness, flaking material, or obvious internal deterioration are different from stains. These usually indicate that replacement is the better option.
When Cleaning Is Not Enough: Signs the Hose Should Be Replaced
Cleaning can extend the service life of a shower hose, but it cannot correct structural failure. Replace the hose if any of the following signs are present:
- Visible cracks or splits: These may worsen under pressure and lead to leaks.
- Persistent leaks after cleaning and tightening: If washers have been checked and fittings still leak, the connector or hose body may be damaged.
- Severe discoloration that remains after cleaning: This can indicate material deterioration rather than surface staining.
- Permanent stiffness or kinking: A hose that no longer flexes properly may have internal wear or hardened materials.
- Damaged threads or fittings: Cross-threaded or corroded connectors can prevent a reliable seal.
For B2B buyers, replacement decisions should consider not only the unit cost of the hose but also maintenance labor, guest or tenant complaints, downtime, and compatibility with existing shower heads and outlets. In many commercial settings, replacing heavily worn hoses in batches can be more efficient than repeated cleaning of failing components.
A clean hose supports hygiene, stable water flow, and efficient shower performance. However, cleaning should be part of a broader maintenance strategy that includes inspection, washer replacement, descaling of shower heads, and timely product replacement when components reach the end of service life.
Related Shower Maintenance Guides
For a complete shower care program, consider pairing shower hose cleaning with related maintenance procedures such as:
- Cleaning and descaling handheld shower heads
- Inspecting rubber washers and connector seals
- Troubleshooting low shower pressure
- Comparing stainless steel and PVC shower hoses for replacement planning
- Preventing limescale in hard-water bathrooms
- Maintaining shower valves, outlets, and diverters
- Building a bathroom fixture inspection checklist for commercial properties
Together, these routines help maintenance teams identify small issues before they become service complaints, while giving buyers clearer criteria for selecting durable, easy-to-maintain shower components.