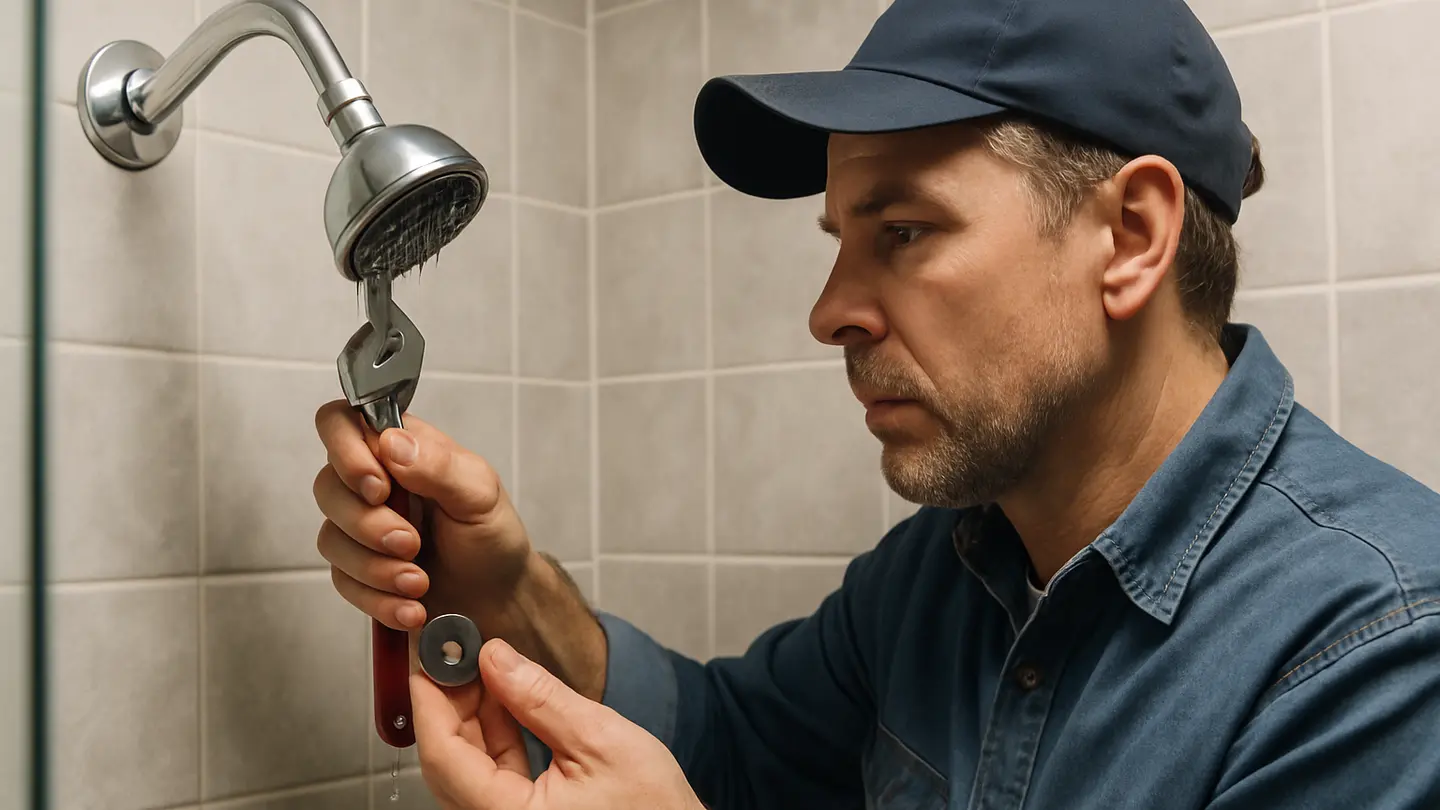
How to Stop a Dripping Shower Head in 6 Practical Steps
A dripping shower head is easy to overlook, but in commercial washrooms, hospitality properties, rentals, gyms, healthcare facilities, and multi-unit buildings, small leaks can waste water, increase utility costs, and signal wear in the shower fitting, valve, or installation.
Many leaks come from routine, fixable issues: mineral buildup, worn washers, loose threaded connections, or missing plumber’s tape. Often, the right repair is cleaning, resealing, or replacing a small rubber part rather than replacing the full shower system.
This guide explains the practical steps to fix a leaking shower head, how to identify likely causes, which tools to prepare, and when to call a plumber.
Common Reasons a Shower Head Starts Leaking
First, identify where and when the leak happens. A drip from the face after the water is turned off can indicate a different issue than water escaping from the threaded connection while the shower is running.
Common causes include hard-water deposits, worn seals, loose fittings, cartridge faults, and installation errors. In B2B environments, water quality, usage frequency, maintenance intervals, and component quality also affect leak risk.
Hard-Water Mineral Deposits
Hard water contains minerals such as calcium and magnesium. Over time, they build up inside the shower head and around spray holes, often appearing as white, chalky limescale.
Mineral buildup can restrict outlets, disrupt flow, and increase back pressure. Water may then escape around the faceplate, base, swivel joint, or threaded connection. In hotels, apartments, dormitories, and other high-use facilities, this can happen faster if water is not softened or fixtures are not cleaned regularly.
A shower head with uneven spray, reduced flow, or visible white crust should be cleaned before more invasive repairs are considered.
Aged Washers or O-Rings
Washers and O-rings create watertight seals at connection points. In a fixed shower head, the internal washer usually sits where the head attaches to the shower arm. Handheld models may have additional washers at the hose, bracket, or diverter.
Rubber parts can flatten, crack, harden, or become brittle after years of heat, pressure, cleaning chemicals, and use. Once the seal loses elasticity, water can escape even if the shower head itself is not damaged.
For maintenance teams, replacement washers and O-rings are inexpensive parts worth keeping in stock, especially where multiple bathrooms use the same fixture model or connection size.
Loose Threaded Connections
A leak at the fitting may come from a loose connection. Shower heads can loosen through vibration, adjustment, cleaning, or frequent use. Handheld shower systems are especially prone to movement at hose and bracket connections.
If water appears at the threaded joint only while the shower is running, check whether the shower head is properly tightened. Gentle tightening by hand or with a wrench may stop the drip.
Avoid overtightening. It can damage threads, deform washers, crack plastic parts, or make future maintenance harder. A snug fit with a good seal is the goal.
A Worn Shower Cartridge
Not every dripping shower head is caused by the shower head. If water continues to drip when the faucet or mixer is fully turned off, the problem may be inside the valve body.
The cartridge controls hot and cold water flow. When it wears, clogs, or fails to seal fully, water can pass through the valve and exit through the shower head. Cleaning the shower head may improve spray performance, but it will not stop this type of drip.
Cartridge problems are common in older systems and high-use facilities. They are more complex than washer replacement because the handle, trim plate, retaining clip, or valve components may need removal.
Installation Errors
A newly installed shower head should not leak. If it does, check the installation first.
Common installation-related causes include:
- Cross-threading between the shower head and shower arm
- Poor fitting alignment
- Missing or incorrectly applied plumber’s tape
- A washer that was not seated correctly
- A connection tightened too loosely or too aggressively
- Old tape or debris left on the shower arm threads
Cross-threading is especially important. If the shower head was started at an angle, the threads may not seat correctly. In severe cases, the threads may be damaged and the part may need replacement.
Step-by-Step: How to Fix a Leaking Shower Head
For most leaks at the shower head connection, the repair sequence is simple: shut off the water, remove the shower head, inspect and clean parts, replace worn seals, reseal threads, reinstall, and test.
The process below applies mainly to fixed shower heads. For handheld models, check every connection: shower arm to bracket, bracket to hose, hose to handle, and any diverter or slide-bar connection.
Prepare the Tools and Materials
Gather the necessary items before disassembly so the fitting is not left open while you search for parts.
| Item | Purpose |
|---|---|
| Adjustable wrench or pliers | Loosening and tightening the shower head connection |
| Soft cloth or towel | Protecting chrome, brushed nickel, matte black, or other finishes |
| Screwdriver | Removing certain faceplates, restrictors, or trim components if applicable |
| Replacement washers or O-rings | Restoring a watertight seal |
| Plumber’s tape | Resealing threaded connections |
| White vinegar | Dissolving mineral buildup |
| Old toothbrush or small brush | Cleaning residue from nozzles and threads |
| Small container or plastic bag | Soaking the shower head in vinegar |
| Bucket or towel | Catching residual water |
For B2B maintenance programs, standardizing fixture models can reduce downtime because teams can stock the correct washer sizes, O-rings, cartridges, and replacement heads.
Step 1: Shut Off the Shower Water
Turn off the shower using the faucet handle or mixer control. For basic shower head removal, this is often enough because the repair is at the outlet side.
For commercial or multi-unit properties, consider shutting off the local isolation valve if available. If the repair involves the valve or cartridge, shutting off the main water supply may be necessary.
Before loosening parts, confirm that water is not actively flowing. Open the shower briefly, then shut it again to relieve pressure and drain residual water from the shower arm.
Step 2: Take Off the Shower Head
Wrap a soft cloth around the shower head connection or connecting nut to protect the finish.
Grip the fitting with an adjustable wrench or pliers and turn it counterclockwise. Once it breaks free, unscrew the shower head by hand. Keep it level because residual water may drain out.
If it is stuck, avoid forcing it. Mineral buildup or old thread tape may have tightened the connection. Use steady pressure rather than jerking the tool. For stubborn fittings, a penetrating lubricant may help, but clean any residue before reinstallation.
After removal, inspect the shower arm threads. Remove old plumber’s tape, mineral deposits, dirt, or deteriorated washer fragments.
Step 3: Inspect and Clean the Parts
Look inside the shower head connection. There is usually a rubber washer seated inside. Remove it carefully and inspect it for cracks, flattening, brittleness, cuts, or deformation. Replace it if it no longer looks flexible and evenly shaped.
Next, inspect the shower head for limescale around spray holes, inside the inlet, or on the swivel joint.
To clean mineral buildup:
- Place the shower head in a container filled with white vinegar.
- Let it soak until deposits soften.
- Scrub the nozzles, inlet screen, and threaded area with an old toothbrush.
- Rinse thoroughly with clean water.
- Check that spray holes are open and free of debris.
Regular descaling can extend fixture performance, especially in hard-water regions. Avoid abrasive tools that can damage finishes or enlarge spray holes, and avoid harsh chemicals unless compatible with the shower head material and finish.
Step 4: Replace Seals and Reseal the Threads
If the washer or O-ring is worn, replace it with a correctly sized part. A washer that is too small may not seal; one that is too large may fold, deform, or prevent proper tightening.
Once the washer is seated properly, prepare the shower arm threads. If the connection relies on threaded sealing, wrap the threads with plumber’s tape. Apply the tape clockwise, following the direction the shower head will tighten, so it does not unravel during installation.
Wrap the threads two or three times, keeping the tape flat and even. Do not cover the pipe opening. Press the tape lightly into the threads.
Important note: some shower head designs rely mainly on an internal rubber gasket rather than thread tape. In those cases, excessive tape can interfere with the fit. Do not use tape as a substitute for a missing or damaged washer.
Step 5: Reattach the Shower Head
Start the connection by hand to reduce the risk of cross-threading. The shower head should turn smoothly. If it catches, binds, or feels angled, stop and restart.
Once hand-tightened, use the cloth and wrench to tighten slightly more if needed. The connection should be snug, not forced. Overtightening may damage threads, compress the washer too much, or crack a lower-grade fitting.
For handheld systems, repeat the same approach at hose and bracket connections. Confirm that washers are in place at each hose end before tightening.
Step 6: Run the Shower and Check for Leaks
Turn the water supply back on and run the shower. Watch the repaired connection closely. Use a dry cloth or tissue around the fitting to detect small moisture.
Check for leaks at:
- The shower arm connection
- The swivel joint
- The faceplate or spray head
- Hose ends on handheld models
- Diverter connections, if present
If there is no moisture around the fitting and the spray pattern is normal, the repair was likely successful. If a small leak remains at the connection, shut off the water, remove the shower head, confirm the washer is seated correctly, and check the tape. If the shower head continues to drip after the water is turned off, troubleshoot further.
What to Check If the Drip Continues
A persistent drip does not always mean the shower head repair failed. The shower head is the final outlet, so water from an upstream problem may appear there.
Ask: does the leak occur only while the shower is running, or does it continue when the shower is turned off?
If water leaks around the connection while the shower is running, focus on the shower head, washer, tape, and threads. If water drips from the spray holes after shutoff, brief residual drainage is normal. A continuous drip may indicate an internal valve issue.
Look Beyond the Shower Head to the Cartridge
A shower that drips while turned off often points to the faucet cartridge. The cartridge sits inside the valve and controls the flow and mix of hot and cold water. When it wears or becomes damaged, it may not close fully.
Cartridge replacement is more involved than cleaning a shower head. It may require removing the handle, trim plate, retaining clip, sleeve, or bonnet, then extracting and replacing the cartridge with a compatible model. In older installations, mineral deposits can make removal difficult.
Before replacing a cartridge, confirm the valve brand and model where possible. Using the wrong cartridge can cause poor temperature control, continued leaks, or valve damage. For facilities with many identical valves, keeping cartridge inventory can reduce downtime. For mixed or older properties, professional identification may be more efficient.
If the maintenance team is unsure about cartridge selection, shutoff procedures, or valve disassembly, calling a plumber is often safer.
When It Is Better to Call a Plumber
DIY repair is reasonable for many shower head leaks, but not every leak should be handled at the fixture level. Call a plumber when:
- Cleaning, washer replacement, and resealing do not stop the leak
- The shower drips continuously when the valve is turned off
- Cartridge replacement is required and the correct procedure is unclear
- The valve trim or cartridge is stuck or corroded
- Threads on the shower arm appear damaged
- Water stains, soft drywall, mold, or wall damage are present
- There is low water pressure throughout the property, not only at one shower
- The leak is inside the wall or behind the valve trim
- The property requires licensed plumbing work for compliance or insurance reasons
Wall damage can indicate a concealed leak behind the shower surface. Building-wide low pressure may point to supply line, pressure regulator, valve, or system-level issues rather than a single shower head.
For B2B buyers and property operators, the decision is also about downtime, tenant or guest disruption, liability, water damage risk, and long-term maintenance cost. A washer replacement is usually appropriate for in-house maintenance. Hidden leaks, valve problems, and repeated failures are better escalated.
Final Takeaway
Leaking shower heads are common, and many are fixable with basic maintenance. Start by identifying where the leak occurs, cleaning mineral buildup, replacing worn washers or O-rings, resealing threaded connections, and reinstalling the shower head carefully.
Prompt repair helps reduce water waste, control utility costs, and restore normal bathroom function. If the drip continues after cleaning and resealing, the issue may be the shower cartridge or another internal plumbing component. Professional support can prevent a small leak from becoming a larger repair.
Another Way to Build a China Supplier Shortlist
For B2B buyers sourcing shower heads, valves, hoses, or related bathroom hardware at scale, repair knowledge can inform purchasing criteria. Consistent washer sizes, accessible spare parts, reliable finishes, and clear installation documentation all matter when comparing suppliers.
Made-in-China.com is a B2B sourcing platform that can help buyers build an initial supplier shortlist. Its Supplier Discovery function provides ways to find and narrow potential suppliers, including Audited Suppliers and regional supplier channels.
Audited Suppliers are subject to third-party verification and on-site audit, with Audit Reports available for buyer review. These reports can support early-stage screening before deeper due diligence, sample evaluation, or commercial negotiation.
Buyers can also use Easy Sourcing to submit one sourcing request and receive multiple quotations from matched suppliers. That can reduce the manual work of contacting suppliers one by one, while still allowing buyers to compare quotes and request samples before procurement decisions.
Related Shower Maintenance Reading
For a broader maintenance program, consider pairing shower head leak repair with related topics such as:
- How to clean limescale from shower fixtures without damaging finishes
- When to replace a shower cartridge instead of the shower head
- How to select shower heads for hotels, apartments, gyms, and rental properties
- Preventive maintenance checklists for high-use bathroom fixtures
- Common installation mistakes that lead to shower leaks or poor spray performance