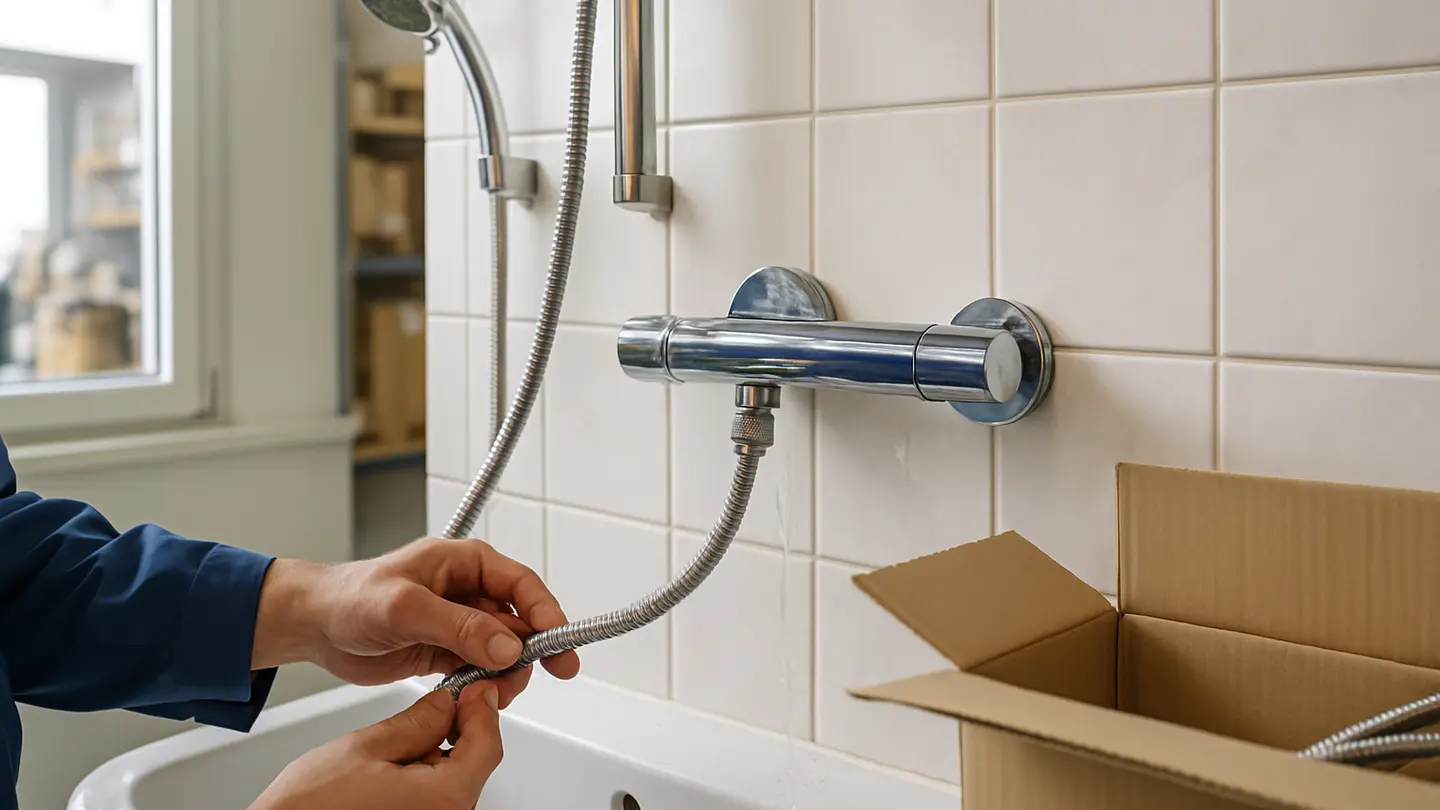
A leaking shower hose can waste water, leave mineral stains, and make an otherwise good shower set feel unreliable. In many cases, the problem is a loose connection, worn washer, misaligned gasket, or buildup on the threads rather than a failed hose. With basic tools and the right replacement seals, you can often stop the drip without replacing the whole shower system.
The key is to identify where the water is escaping first. A leak at either end of the hose usually needs tightening, cleaning, or a new seal. A leak from the hose body usually means the hose should be replaced.
Main Points Before You Start
Most shower hose leaks are either connection leaks or hose-body leaks.
A connection leak appears where the hose attaches to the hand shower, showerhead, wall outlet, mixer, or diverter. Common causes include loose hose nuts, damaged washers, flattened gaskets, or O-rings that no longer sit correctly. If the seal has hardened, cracked, shifted, or fallen out, tightening alone may not solve the problem.
A hose-body leak is different. If water sprays or seeps from the flexible section, the hose material is likely cracked, punctured, split, or weakened from years of bending, twisting, kinking, or temperature changes. Replacement is normally the proper fix. Tape may slow the leak briefly, but it is not a durable repair.
Rust, limescale, and mineral deposits can also cause persistent drips. Even if the washer is usable, buildup on the threads or sealing face can prevent the fitting from compressing evenly. Cleaning the connection and replacing the seal often solves this type of leak.
Before starting, confirm the leak location, prepare basic tools, and avoid forcing parts. Many shower hose fittings are decorative as well as functional, so rough handling can scratch the finish or damage the threads.
Common Reasons a Shower Hose Starts Leaking
A shower hose depends on several small parts working together: the flexible hose body, threaded end nuts, internal washers or gaskets, and the mating threads on the showerhead and water outlet. When any part loses alignment or sealing pressure, water can escape.
Loose hose connections are one of the easiest causes to fix. The nut at the showerhead end or wall outlet end may gradually loosen through daily use, especially if the hand shower is often removed from its holder or the hose is twisted during cleaning. When the fitting is not fully seated, water can pass around the washer and drip from the joint.
Old washers, gaskets, and O-rings are another common source of leaks. These small sealing parts are usually made from rubber or similar flexible materials. Over time, they may become brittle, compressed, flattened, cracked, or distorted. A washer that has lost elasticity cannot create a tight seal, even if the fitting appears firmly attached. In some cases, the gasket may be missing after a previous repair or hose replacement.
The hose body itself can also fail. Flexible shower hoses are repeatedly bent, stretched, twisted, and exposed to changing water temperatures. If the outer layer shows splits, bulges, punctures, unraveling, or sharp bends that do not relax, replacement is usually more reliable than repair.
Hard water can make connection leaks worse. Mineral deposits may collect on the threads, inside the hose nut, or around the sealing surface. Corrosion can have a similar effect, especially where water remains on metal fittings after use. These deposits stop parts from mating cleanly and may cause a slow drip even when the hose is tightened.
Excessive water pressure can also stress the hose and fittings. If several shower components leak repeatedly, the issue may not be the hose alone.
Step-by-Step Method to Fix the Leak
The best repair depends on whether the water is escaping from a connection or from the hose body. Do not start by tightening everything aggressively. Over-tightening can damage threads, crush washers, or crack plastic components. Inspect the hose carefully, then choose the least invasive repair that addresses the actual cause.
Step 1: Find Exactly Where the Water Is Escaping
Run the shower briefly and watch the hose under normal use. Keep your hands clear of hot water and check one area at a time.
First, inspect the joint between the shower hose and the hand shower or showerhead. If water beads around the hose nut, runs down from the connection, or sprays from the joint, the issue is likely a loose fitting, worn washer, misaligned gasket, or debris inside the connection.
Next, check the lower end of the hose where it connects to the wall outlet, mixer fitting, shower valve outlet, or diverter. Look for water collecting at the nut, dripping from the underside, or running down the wall plate.
Then inspect the full hose length. Bend it gently and look for pinholes, cracks, splits, swelling, rust spots, separated layers, or sharp kinks. If water escapes from the hose body rather than the threaded ends, tightening the fittings will not solve it.
Use a dry cloth if needed. Wipe the hose and fittings dry, run the water again, and watch where the first wet spot appears. The first point of water escape matters more than where the water eventually drips.
Step 2: Prepare the Tools and Replacement Parts
For most shower hose repairs, you only need simple tools and inexpensive replacement parts. Prepare them before disassembly so the shower is not left unusable.
Useful items include:
- Adjustable wrench or pliers
- Soft cloth, rubber pad, or protective tape to place between the tool and fitting
- Replacement washers, gaskets, or O-rings of the correct size
- New shower hose if the existing hose is cracked, punctured, burst, or badly kinked
- White vinegar or suitable descaler for mineral buildup
- Small brush, old toothbrush, or soft nylon brush
- Clean towel or rag
- PTFE plumber’s tape, only where it is suitable for the specific threaded joint
The soft cloth matters because chrome, brushed, matte, and plated finishes scratch easily. Wrap the fitting before gripping it with a wrench or pliers.
Pay close attention to the seal type. Many shower hose connections seal by compressing a flat washer or gasket inside the hose nut. In those cases, plumber’s tape on the threads is not the main sealing method and will not replace a missing or damaged washer. PTFE tape is more appropriate for certain tapered or pipe-threaded joints, such as some shower arm connections.
If buying a replacement hose, confirm the fitting size, hose length, finish, and compatibility with your showerhead, hand shower, or outlet.
Step 3: Shut Off the Water Before Disassembly
Turn off the water before removing the hose or opening any connection. For a basic shower hose repair, closing the shower control valve is usually enough because the hose is downstream of the valve. After shutting it off, allow remaining water to drain from the hand shower and hose.
If the shower valve does not fully shut off, water continues to flow, or you are working on a more complex mixer or diverter arrangement, shut off the main water supply or the local isolation valve if available.
Do not remove a hose while water is under pressure. Even slight pressure can cause unexpected spray and make it harder to avoid damaging the fitting.
Step 4: Tighten, Reseal, Clean, or Replace the Hose
Once the water is off, choose the repair based on your inspection.
For a minor connection leak, tighten the fitting gently by hand first. Many hose nuts only need to be snug, not heavily tightened. If hand-tightening is not enough, use an adjustable wrench or pliers with a cloth protecting the finish. Turn slowly and stop when the fitting feels secure. Over-tightening can deform the washer, strip threads, or make the next repair harder.
If the leak continues, remove the hose from the leaking end. Look inside the nut for the washer, gasket, or O-ring. Check whether it is seated flat, centered, and undamaged. Replace the seal if it is cracked, brittle, flattened, stretched, missing, or visibly deformed.
Before reconnecting, clean the mating surfaces. Remove loose debris, rust, and scale from the threads and sealing face. For limescale, soak removable parts in vinegar or use an appropriate descaler according to the product instructions. Brush gently rather than scraping with sharp metal tools, which can damage threads or finishes. Rinse and dry the parts before reassembly.
Reinstall the hose with the washer properly seated inside the nut. Thread the fitting on by hand first to avoid cross-threading. If the nut does not turn smoothly, back it off and realign it. Once hand-tight, give it a careful final snug with a protected wrench if needed.
If water is escaping from the hose body, replace the entire hose. A cracked, split, pinholed, or burst hose is not a good candidate for long-term patching. Waterproof tape may reduce a minor leak temporarily, but water pressure, heat, and hose movement usually make this unreliable. For a facility, rental property, hotel, or commercial installation, replacement is the safer and more professional solution.
When installing a new hose, avoid twisting it during tightening. Hold the hose in a natural position and rotate the nut rather than spinning the entire hose body. A twisted hose can kink during use and fail earlier.
Step 5: Run the Shower and Check for Remaining Drips
After reassembly, turn the water back on gradually. Run the shower under normal pressure and inspect both ends of the hose, plus the full hose length.
Use a dry tissue or cloth around each joint to detect small drips. If the tissue becomes wet at a connection, turn the water off and recheck the washer position, thread alignment, and tightness. If the hose body still leaks after replacement, verify that water is not running down from a higher connection and appearing on the hose surface.
Let the shower run briefly, then turn it off and check again. A few drops from the showerhead after shutoff can be normal drainage, but continued dripping from the hose connection means the seal still needs attention.
Ways to Reduce the Risk of Future Hose Leaks
Regular inspection is the simplest way to prevent a leaking shower hose from becoming a bigger maintenance issue. Check the hose body, fittings, seals, and finish condition periodically, especially in high-use bathrooms such as hotels, gyms, rental units, and multi-family properties.
Look for early warning signs: stiff movement, visible kinks, surface cracking, rust at the fittings, mineral buildup, loosened nuts, or dampness around the hose ends. A hose that has become difficult to rotate or position may be under strain, which can eventually lead to leaks.
Where practical, dry the fittings after use. This is especially useful in hard-water areas or bathrooms with limited ventilation. Removing standing water from the hose nuts and outlet area can help reduce corrosion and slow mineral accumulation.
Choose replacement hoses carefully. A durable hose should have compatible fittings, reliable internal seals, sufficient flexibility, and a suitable length. A hose that is too short may pull on the fittings, while one that is too long may loop sharply or kink. For commercial or project purchasing, consistency of fit, finish, and sealing quality matters because small installation issues can multiply across many bathrooms.
Avoid using the hose as a handle or pulling the hand shower by the hose. Repeated tension at the end fittings can loosen connections and damage seals. When cleaning, return the hose to a natural curve rather than leaving it twisted.
If high water pressure is suspected, consider a professional assessment. Consistently high pressure can shorten the life of hoses, washers, cartridges, and other shower components. Depending on the plumbing system, a pressure regulator or adjustment may be appropriate, but this should be handled according to local plumbing requirements.
When a Plumber Should Handle the Repair
Call a plumber if the leak continues after you have tightened the fittings, replaced damaged seals, cleaned the threads, and replaced a damaged hose. Persistent leaking may indicate that the problem is not the hose itself.
Professional help is also appropriate if you are not comfortable disassembling fittings, if the connection is difficult to access, or if parts appear corroded in place. Forcing a stuck fitting can damage the outlet, mixer, diverter, or wall connection.
A plumber should inspect the system if multiple components leak repeatedly, if the shower valve does not shut off fully, or if the outlet fitting appears loose in the wall. These symptoms may point to pressure issues, valve problems, damaged threads, poor installation, or movement behind the finished surface.
For commercial properties, professional repair may be preferable when downtime, guest complaints, or water damage risk is a concern. Correct diagnosis helps prevent repeated callouts and unnecessary part replacement.
FAQ
1. Can I use waterproof tape to fix a leaking shower hose?
Waterproof tape may reduce a small leak temporarily, especially if the hose body has a minor pinhole or the repair must wait until a replacement part is available. However, it is not a reliable long-term fix.
A lasting repair requires addressing the cause. If the connection is leaking, inspect and replace the washer, gasket, or O-ring, then clean and reconnect the fitting correctly. If the hose body is cracked, split, or punctured, replace the hose rather than relying on tape.
2. How often should I replace my shower hose?
There is no universal replacement schedule for every shower hose. Service life depends on water quality, usage frequency, hose material, installation quality, cleaning habits, and water pressure.
Replace the hose when you see cracks, kinks, rust, punctures, leaking connections that cannot be solved with new seals, or other visible wear. Regular inspection is more useful than following a fixed date. If the hose no longer moves freely or shows damage at the ends, replacement is usually the practical choice.
3. Why is my new shower hose leaking?
A new shower hose often leaks because of installation issues rather than a defective hose. Common causes include a loose connection, cross-threaded fitting, missing washer, misaligned gasket, or seal that is not seated flat inside the hose nut.
Turn off the water, remove the leaking end, and check the washer position. Reconnect the fitting by hand first to ensure proper thread alignment, then tighten gently. If the gasket is damaged or the fitting does not match the outlet or showerhead, replace the incorrect part before using the shower again.