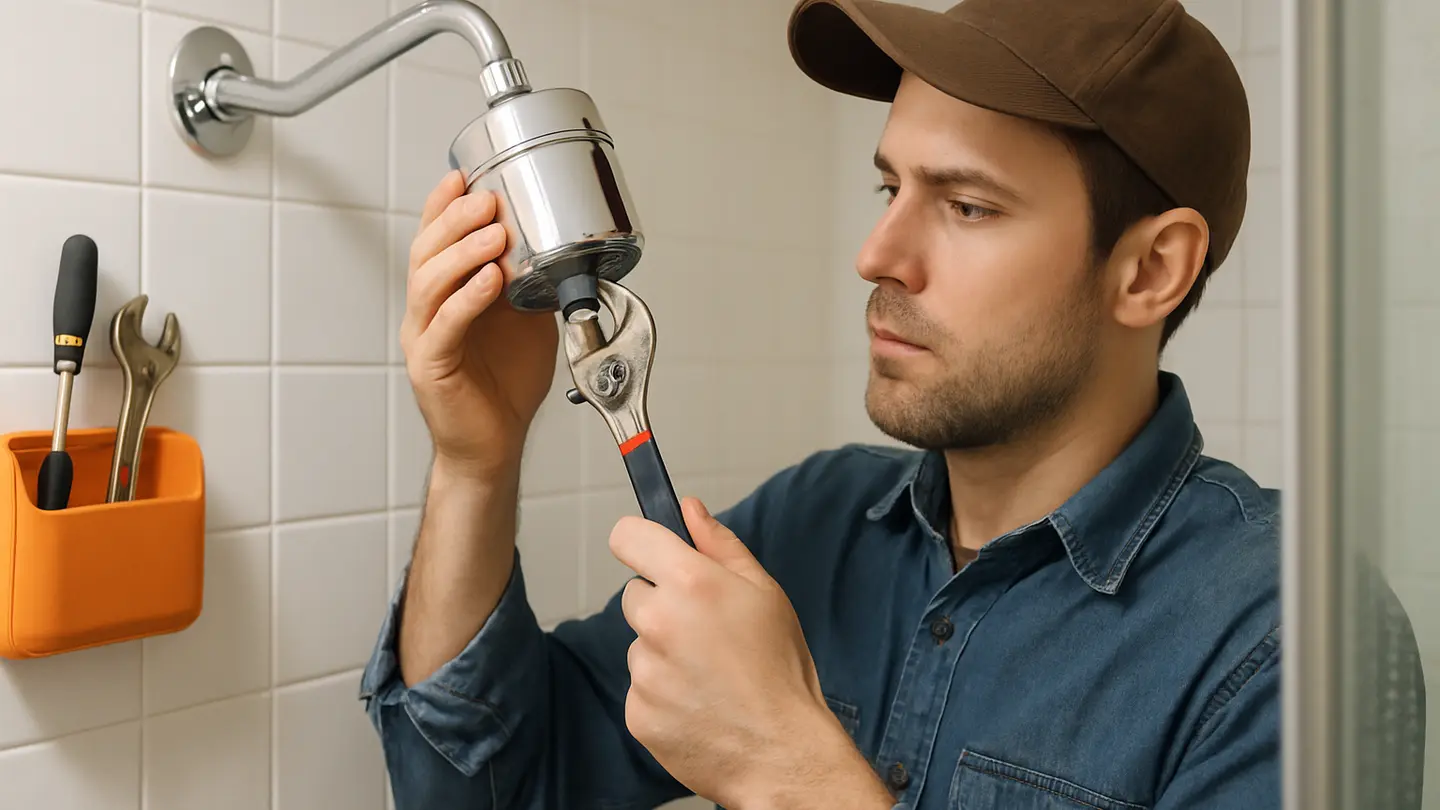
A shower filter is typically an inline device installed between the shower arm and the showerhead. For facility teams, distributors, installers, and hospitality or multifamily buyers, knowing how to install a shower filter helps estimate maintenance time, compatibility, and lifecycle cost across multiple units.
Most installations follow a simple sequence: remove the existing showerhead, apply plumber’s tape where needed, attach the filter, reconnect the showerhead, test the connections, and flush the filter before first use. Details vary by model, connection design, and local water conditions, so the product manual should always be the final reference.
A shower filter may improve the perceived feel or odor of shower water and may help reduce selected substances such as chlorine, sediment, or scale-related buildup depending on the media. It is not a universal water-treatment solution; performance depends on filter design, cartridge condition, flow rate, and incoming water quality.
Before You Start: Installation Checklist
Preparation helps avoid leaks, cross-threading, compatibility issues, and repeated disassembly. Before opening the packaging or removing a showerhead, confirm that the filter suits the existing fixture and that the required tools are available.
For B2B buyers managing many rooms or properties, this stage is especially important. A filter that installs quickly on one shower may require adapters, different hoses, or extra labor on another. Standardizing fixture types and confirming connection dimensions in advance can reduce installation time and service calls.
Tools and Materials to Have Ready
Most shower filter installations require only basic tools and consumables:
- Adjustable wrench: Useful when an existing showerhead is too tight to loosen by hand.
- Plumber’s tape: Also known as thread seal tape, this helps create a watertight seal on threaded metal connections.
- Soft cloth or rag: Wrap it around finished parts before using a wrench to reduce the risk of scratches.
- Towel or small bucket: Place below the connection to catch residual water.
- Replacement washers or seals: Many filters include washers; inspect them before installation.
- Product manual: Instructions may specify flow direction, flushing time, tightening limits, or cartridge preparation.
Avoid excessive force or sharp-jawed tools directly on decorative fixture finishes. If the existing showerhead is heavily scaled or seized, a gentle descaling step may be required before removal.
Choosing a Compatible Shower Filter
Compatibility should be checked before installation. Most inline shower filters sit between a fixed shower arm and a showerhead, but configurations vary. Some bathrooms use fixed showerheads, handheld hoses, rain heads, slide bars, or diverter assemblies.
When selecting a filter, consider the following points:
| Buying consideration | Why it matters |
|---|---|
| Target water issue | Different media may focus on chlorine reduction, sediment, odor, or scale-related concerns. |
| Shower type | Fixed and handheld showerheads may require different connection arrangements. |
| Thread compatibility | Standard threaded connections are common, but adapters may be needed in some markets or fixture types. |
| Cartridge lifespan | Shorter cartridge life increases maintenance frequency and operating cost. |
| Flow rate impact | Some filters may slightly reduce flow, especially as the cartridge becomes loaded. |
| Housing size | Larger filters may interfere with low shower arms, wall clearance, or compact enclosures. |
| Replacement availability | For commercial use, consistent cartridge supply is as important as the initial purchase. |
For chlorine-focused applications, filters commonly use media such as activated carbon, KDF, or other treatment blends. For hard-water-related buildup, some products aim to reduce scale formation or capture particulates, but they should not be confused with whole-building water softeners. If the goal is to address a verified water quality issue, review product specifications and relevant third-party testing claims carefully.
Step-by-Step Shower Filter Installation
For most standard shower fittings, installing a shower filter is a short DIY task. The basic order is straightforward: remove the existing showerhead, attach the filter to the shower arm, reconnect the showerhead or handheld hose, test for leaks, and flush the filter.
Following the steps in order helps protect threads, washers, and housings. Rushing can lead to crooked threading, damaged seals, or slow leaks that appear after several uses.
Step 1: Remove the Existing Showerhead
Make sure the shower water is turned off. The valve usually does not need to be shut off at the main supply, but the shower control should be fully off.
Place a towel or bucket under the shower arm to catch residual water. Cover the drain if the existing showerhead has a washer, restrictor, or small adapter that could fall during removal.
Try unscrewing the showerhead by hand. In most cases, turn it counterclockwise while holding the shower arm steady. If it is too tight, use an adjustable wrench and wrap a soft cloth around the connector to protect the finish.
After removal, inspect the exposed shower arm threads. Remove old plumber’s tape, mineral residue, and debris. A clean threaded surface improves sealing and reduces the likelihood of cross-threading. If mineral buildup is heavy, use a mild descaling approach compatible with the fixture finish.
Do not force the shower arm itself. If the arm moves in the wall or appears loose, stop and assess the connection before continuing. In commercial or multifamily settings, a loose shower arm may indicate a wall fitting that needs maintenance before any filter is added.
Step 2: Fit the Shower Filter to the Shower Arm
Before attaching the filter, inspect the body and included parts. Confirm that washers, seals, O-rings, or gaskets are properly seated. If the filter has a marked inlet and outlet, orient it according to the manufacturer’s instructions. Some units are directional, and reversing them may reduce performance or cause leaks.
Wrap plumber’s tape around the shower arm threads if the filter design calls for it. Apply the tape in the same direction the filter will turn when tightened, usually clockwise when facing the pipe end. Two or three neat wraps are often enough, but follow the product manual if it gives a specific recommendation. Avoid bunching the tape at the end of the threads.
Thread the filter onto the shower arm by hand. It should turn smoothly. If it feels crooked or binds after one or two turns, back it off and restart. Cross-threading can damage metal threads or crack plastic fittings.
Hand-tighten the filter until it is snug and correctly aligned. Do not overtighten. Many filter housings include plastic components, internal seals, or decorative collars that can be damaged by excessive torque. If a wrench is permitted, use only a slight additional turn and protect the finish with a cloth.
Step 3: Reattach the Showerhead
Once the filter is attached to the shower arm, connect the showerhead to the filter outlet. Depending on the design, plumber’s tape may be needed on the filter outlet threads. Some showerheads seal primarily with an internal washer, while others benefit from tape. If the manufacturer supplies a washer, use it unless the manual states otherwise.
Thread the showerhead onto the filter outlet by hand. Keep the connection straight and turn gently. When it is snug, stop. If the showerhead needs final alignment, adjust it carefully without using the filter housing as a lever.
For handheld showerheads, the hose connects to the filter outlet rather than a fixed showerhead body. Check both ends of the hose and make sure washers are in place, as missing washers are a common cause of dripping.
If the shower includes a diverter, slide bar, or specialty bracket, verify that the added length and weight of the filter do not interfere with normal operation. In hotels, rental housing, and institutional bathrooms, clearance and durability matter because users may pull or adjust the fixture frequently.
Step 4: Test the Connections and Flush the Filter
Turn the water on slowly. Do not open the valve fully at first. Allow water to pressurize the assembly gradually while you inspect each threaded joint.
Check the connection between:
- The shower arm and the filter inlet
- The filter outlet and the showerhead or handheld hose
- Any hose-to-wand or diverter connections that were moved during installation
If minor dripping appears, turn the water off before making adjustments. Tighten the leaking joint slightly by hand if possible. If the leak continues, disassemble the connection, inspect the washer, clean the threads, and reapply plumber’s tape where appropriate.
After the connections are sealed, flush the filter according to the manual. Many new filters should run for several minutes before the first shower to clear loose filtration media, fine particles, or carbon dust. During flushing, water may appear temporarily discolored or contain small particles. This should clear as the filter rinses.
Record the installation date on a maintenance log, property management system, or cartridge label. For multi-unit installations, tracking dates is essential because cartridge replacement schedules can quickly become inconsistent if they are not documented.
What to Check After Installation
Post-installation checks confirm that the assembly is sealed, stable, and ready for routine use. Inspect the filter immediately after installation and again after several showers.
Two areas matter most: leak inspection and early maintenance. A filter that appears secure during installation may drip after thermal expansion, user adjustment, or repeated pressure changes.
Inspect for Leaks at Both Filter Connections
Inspect the joint where the filter connects to the shower arm. Look for beads of water at the thread line, slow drips down the filter body, or moisture behind the collar. Even a small leak can create staining, mineral deposits, or callbacks in commercial environments.
Next, inspect the joint where the showerhead or handheld hose connects to the filter outlet. For handheld models, also check the hose connection at the wand if it was disturbed.
If leaking occurs, shut off the water before adjusting the connection. Do not tighten a pressurized joint aggressively while water is running. Remove and reinstall the connection if needed, paying close attention to washer placement and thread alignment.
Reapplying plumber’s tape can help resolve leaks at threaded joints, but tape should not replace a missing or damaged washer where the design requires one. If the filter uses O-rings or compression-style seals, inspect them for twisting, flattening, or debris.
First-Use Maintenance Tips
Flush the filter before the first shower, even if the water appears clear after a short rinse. Loose particles from filtration media can remain in the cartridge.
Some users may notice temporary water pressure changes after installation. A small change can be normal because the water is passing through additional media. However, a severe drop may indicate an installation issue, clogged inlet screen, incorrect orientation, washer obstruction, or a cartridge that was not prepared properly.
Wipe the visible filter housing and showerhead regularly to reduce soap residue and mineral buildup. In hard-water areas, scale can form around joints and spray nozzles even when a shower filter is installed.
For compatible removable parts, a monthly white vinegar soak may help loosen mineral deposits. Remove the part, soak it in a diluted white vinegar and water solution, rinse thoroughly, and reinstall it once dry. Before soaking decorative finishes, rubber parts, or coated components, confirm that vinegar is acceptable for the material.
How to Maintain a Shower Filter Over Time
A shower filter is not a set-and-forget fixture. Ongoing maintenance supports consistent flow, helps preserve filtration performance, and reduces leaks caused by buildup or worn seals.
The two main responsibilities are cartridge replacement and routine cleaning. Requirements vary by product, water quality, and usage volume. A filter in a high-occupancy hotel room, gym shower, salon, or multifamily unit may reach its service limit faster than one in a low-use residential bathroom.
Always follow the product manual for cartridge handling, replacement intervals, flushing procedures, and cleaning restrictions.
When the Filter Cartridge Should Be Replaced
Filter cartridge life varies by model, media type, incoming water quality, and total water use. Manufacturer replacement intervals should be treated as the primary guide. Some cartridges are rated by time, some by gallons or liters, and some by a combination of both.
Possible signs that replacement is due include:
- Noticeably reduced water pressure
- Return of chlorine-like odor or other unwanted smell
- Visible sediment or discoloration after the filter has already been flushed
- Mineral buildup around the outlet or showerhead
- Uneven spray pattern caused by residue accumulation
- Cartridge age beyond the recommended replacement period
Reduced pressure does not always mean the cartridge is exhausted; it may also indicate clogged showerhead nozzles or debris at the inlet. Still, pressure loss is a practical maintenance cue and should be investigated.
Cartridge replacement usually involves opening the filter housing, removing the spent insert, installing a new cartridge in the correct orientation, resealing the housing, and flushing the unit again before use. For larger properties, replacement should be scheduled in batches where possible to reduce labor cost and maintain consistent guest or tenant experience.
Keep spare cartridges in inventory if the filter is used across multiple bathrooms. When evaluating suppliers, confirm replacement cartridge availability, packaging format, shelf-life guidance, and whether cartridge designs are likely to remain consistent over the purchasing period.
Routine Cleaning for the Filter Assembly
Periodic cleaning helps limit mineral scale, soap residue, and surface staining on the filter housing and connected showerhead. This is especially important in hard-water areas or high-use facilities.
A simple cleaning routine may include:
- Turn off the shower and allow the fixture to drain.
- Wipe the filter housing, showerhead, and hose exterior with a soft damp cloth.
- Remove compatible parts such as the showerhead faceplate or hose end if the manual allows.
- Soak removable parts in a white vinegar and water solution to loosen mineral deposits.
- Rinse thoroughly with clean water.
- Allow parts to air dry before reinstalling.
- Run water briefly after reassembly to confirm clear flow and leak-free connections.
Avoid harsh chemicals, abrasive pads, strong acids, or solvents unless the manufacturer specifically approves them. Aggressive cleaners can damage rubber seals, plastic housings, plated finishes, and filtration media. Do not soak the cartridge itself unless the product manual clearly states that it is safe.
For B2B maintenance programs, cleaning frequency should reflect water hardness, usage volume, and brand standards for visible fixtures. A filter that performs adequately but looks stained or scaled may still create a poor impression in hospitality, wellness, or premium residential environments.
Related Buying Guide Resources
For a broader specification and sourcing process, these related topics are useful:
- Shower filter buying guide: Compare media types, cartridge life, housing materials, and flow-rate considerations.
- Fixed vs. handheld showerheads: Review compatibility, user experience, accessibility, and maintenance differences.
- Bathroom fixture installation checklist: Standardize tools, sealing materials, inspection steps, and documentation across multiple units.
- Water quality considerations for commercial bathrooms: Identify when point-of-use filtration is suitable and when whole-building treatment may be more appropriate.